Gradle Android Studio
Introduction:
- Gradle is an automated build toolkit that can integrate into lots of different environments, via plugins.
- Minimize Configuration Required for New Projects: Gradle has a set of default configuration settings that are automatically applied to every project you create in Android Studio. If you're developing a project that doesn't adhere to these default configuration rules, Gradle is easy to customize.
- Declare Project Dependencies: Dependencies can be modules, JAR files or libraries, and they can be located either on the local file system or a remote server.
- Test Your Project: Gradle automatically generates a test directory and a test APK from your project's test sources and can run your tests during the build process.
- Generate Signed APKs: If you add all the necessary information, such as keyPassword and keyAlias, to your Gradle build file, you can use Gradle to generate signed APKs.
- Generate Multiple APKs from a Single Module: Gradle can generate multiple APKs with different package and build configurations from a single module. This feature is particularly handy for Android developers, for several reasons:
Support a Wide Range of Devices,
Offer Different Versions of an App like Demo or Pro
Gradle Build Files:
- Gradle build files use a Domain Specific Language or DSL to define custom build logic and to interact with the Android-specific elements of the Android plugin for Gradle.
- Android Studio projects consist of one or more modules, which are components that you can build, test, and debug independently. Each module has its own build file, so every Android Studio project contains two kinds of Gradle build files:
- Top-Level Build File: This is where you'll find the configuration options that are common to all the modules that make up your project.
- Module-Level Build File: Each module has its own Gradle build file that contains module-specific build settings. You'll spend most of your time editing module-level build file(s) rather than your project's top-level build file.
To take a look at these build.gradle files, open Android Studio's Project panel (by selecting the Project tab) and expand the Gradle Scripts folder. In our sample project, the first two items in the list are your project's top-level and module-level build files.
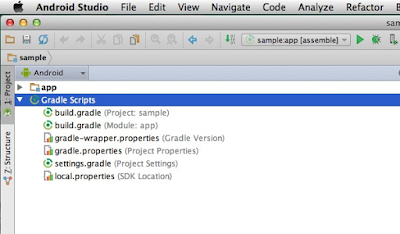
The screenshot below gives you an idea of how the Gradle Scripts folder might look for a project with multiple modules.
Top-Level Gradle Build File:
- Every Android Studio project contains a single, top-level Gradle build file. This build.gradle file is the first item that appears in the Gradle Scripts folder and is clearly marked Project.
- Most of the time, you won't need to make any changes to this file, but it's still useful to understand its contents and the role it plays within your project. Below is an annotated version of a typical top-level build file.
//Project-level Gradle build files use buildscript to define dependencies.//
buildscript {
repositories {
// jcenter() is a superset of mavenCentral(), it uses HTTPs to serve content, it is faster than mavenCentral() //
jcenter()
}
//This file relies on the jcenter repository.//
dependencies {
classpath 'com.android.tools.build:gradle:1.5.0'
//Project is dependent on version 1.5.0 of the Android plugin for Gradle.//
// NOTE: Do not place your application dependencies here; they belong
// in the individual module build.gradle files
}
}
allprojects {
//Defines the dependencies required by your application.//
repositories {
jcenter()
}
}
//Application depends on the jCenter repository.//
task clean(type: Delete) {
delete rootProject.buildDir
}
There are 3 main areas to this Android build file:
buildscript { ... }
You will notice a new closure buildscript. This is nothing to do with App Engine and is generally used to specify dependencies that the build script will need to it. In our case, this script requires the App Engine Gradle library to be present and hence we are specifying it via the normal dependency and specifying from which repository to take it.
- Configures the code driving the build.
- In this case, this declares that it uses the jCenter repository,
- There is a classpath dependency on a Maven artifact. This artifact is the library that contains the Android plugin for Gradle in version 1.3.1.
Note: This only affects the code running the build, not the project. The project itself needs to declare its own repositories and dependencies.
allprojects { ... }
We have the dependencies that this project source code needs to compile.
task clean
- Basically it is used to clean build system, It delete the build directory when run.
- Task type is Delete (Can also be copy)
- When modify the file settings.gradle click sync, will delete the file rootProject.buildDir
Module-Level Gradle Build Files
In addition to the project-level Gradle build file, each module has a Gradle build file of its own. Below is an annotated version of a basic, module-level Gradle build file.
apply plugin: 'com.android.application'
//Since this project is an Android app, the build.gradle file utilises the Android plugin. if there is any library project then we'll use apply plugin: 'com.android.library' as plugin //
android {
// The following section configures all your project’s Android-specific parameters, and tells Gradle which version of Android it should build your project with. If you’ve developed Android applications before, the following should all be familiar. //
// Signing configuration to generate signed app if you already have .jks file //
signingConfigs {
config {
keyAlias 'test'
keyPassword 'test123'
storeFile file('/home/shivang/Desktop/test.jks')
storePassword 'test123'
}
}
compileSdkVersion 21
//The API your project is targeting.//
buildToolsVersion "21.1.1"
////The version of the build tools you want to use.//
defaultConfig {
applicationId "com.example.jessica.myapplication"
//Defines your application’s ID. Note, earlier versions of the Android plugin used ‘packageName’ instead of ‘applicationID.’//
minSdkVersion 16
//The minimum API required by your project.//
targetSdkVersion 21
//The version of Android you’re developing your application for.//
versionCode 1
versionName "1.0"
}
buildTypes {
release {
// add signing configuration for build //
signingConfig signingConfigs.config
// ‘BuildTypes’ controls how your app is built and packaged. If you want to create your own build variants, you’ll need to add them to this section. //
minifyEnabled true
shrinkResources true
// Resource shrinking is the automatic removal of resources that are unused, at build time, in the packaged app, you have to enable minifyEnabled in order to turn on code shrinking.
// Gradle runs ProGuard during the build process.//
proguardFiles getDefaultProguardFile('proguard-android.txt'), 'proguard-rules.pro'
//Applies the default ProGuard settings from the Android SDK.//
}
// Generates Different variants of app //
productFlavors {
demo {
applicationId = "com.example.myapplication.demo"
resValue "string", "app_name", "Demo App"
}
full {
applicationId = "com.example.myapplication.full"
resValue "string", "app_name", "Full App"
}
}
}
dependencies {
// A folder entirely dependent, All the jar file exist in libs directory will automatically included //
compile fileTree(dir: 'libs', include: ['*.jar'])
// single file depends
compile Files ( 'libs / Android-Support-v4.jar' )
// Gradle dependency that points to the wearable app module, because users cannot browse and install apps directly on the wearable. If packaged properly, when users download the handheld app, the system automatically pushes the wearable app to the paired wearable.
wearApp project(':wear')
// Testing dependencies
testCompile 'junit:junit:4.12'
// Application format: packageName: artifactId: Version
compile 'com.android.support:appcompat-v7:23.1.1'
compile 'com.google.android.gms:play-services:8.3.0'
compile 'com.android.support:design:23.1.1'
compile 'com.kevinpelgrims.library:library:1.0.0@aar'
// Using the @aar notation if you want to download the dependencies, you should add, otherwise it may skip some dependencies //
transitive=true
compile(name:'yourlibraryname', ext:'aar')
}
apply plugin:
- The com.android.application plugin is applied. This is the plugin used for building Android applications.
- if there is any library project then we'll use apply plugin: 'com.android.library' as plugin
android { ... }
- configures all the parameters for the android build.
- This is the entry point for the Android DSL.
- By default, only the compilation target, and the version of the build-tools are needed. This is done with the compileSdkVersion and buildtoolsVersion properties.
Other Gradle Files:
In addition to the build.gradle files, your Gradle Scripts folder contains some other Gradle files. Most of the time you won't have to manually edit these files as they'll update automatically when you make any relevant changes to your project. However, it's a good idea to understand the role these files play within your project.
gradle-wrapper.properties (Gradle Version)
This file allows other people to build your code, even if they don't have Gradle installed on their machine. This file checks whether the correct version of Gradle is installed and downloads the necessary version if necessary. In our sample app,gradle-wrapper.properties contains the following:
distributionBase=GRADLE_USER_HOME
//Determines whether the unpacked wrapper distribution should be stored in the project, or in the Gradle user home directory.//
distributionPath=wrapper/dists
//The path where the Gradle distributions required by the wrapper are unzipped.//
zipStoreBase=GRADLE_USER_HOME
zipStorePath=wrapper/dists
distributionUrl=https\://services.gradle.org/distributions/gradle-2.2.1-all.zip
//The URL where the correct version of Gradle should be downloaded from.//
settings.gradle
This file references all the modules that make up your project. Since our sample project has a single module, this file is very straightforward as you can see below.
include ':app'
or
include ':mobile', ':wear', ':tv', ':glass', ':mylibrary'
gradle.properties (Project Properties)
This file contains configuration information for your entire project. It's empty by default, but you can apply a wide range of properties to your project by adding them to this file.
// Used to speed up gradle build process //
//When configured, Gradle will run in incubating parallel mode.
org.gradle.parallel=true
//Gradle runs on the Java Virtual Machine (JVM) and uses several supporting libraries that require a non-trivial initialization time. As a result, it can sometimes seem a little slow to start. The solution to this problem is the Gradle Daemon: a long-lived background process that executes your builds much more quickly than would otherwise be the case.
org.gradle.daemon=true
local.properties (SDK Location)
This file tells the Android Gradle plugin where it can find your Android SDK installation. For example:
ndk.dir=/home/shivang/programFiles/android-sdk-linux/ndk-bundle
sdk.dir=/home/shivang/programFiles/android-sdk-linux
Note that local.properties contains information that's specific to the local installation of the Android SDK. This means that you shouldn't keep this file under source control.
Some Important Points:
Question 1: Set up compile dependencies in Android Studio in build.gradle. I mean that they not include into final APK.
this build.gradle works fine but i don't need
lombok
library in apk in runtime;
apply plugin: 'android'
android {
compileSdkVersion 19
buildToolsVersion "19.0.0"
defaultConfig {
minSdkVersion 10
targetSdkVersion 16
versionCode 1
versionName "1.0"
}
buildTypes {
release {
runProguard false
proguardFiles getDefaultProguardFile('proguard-android.txt'), 'proguard-rules.txt'
}
} }
dependencies {
compile 'com.android.support:appcompat-v7:+'
compile 'org.projectlombok:lombok:1.12.2' }
And may be its possible to setup in global build.gradle file for all projects?
Answer:
Android Gradle plugin adds a 'provided' dependency scope for dependencies needed only for compile time that are not linked into the APK.
You specify it like this:
dependencies {
provided 'org.projectlombok:lombok:1.12.2'
}


